Hi DIYers! Today, we're presenting our own guide for installing the Qolsys IQ Panel 2 Plus. This system is very easy to use, and it can be installed by virtually anyone using nothing more than a screwdriver! This is the perfect security system for your home, office, or apartment!
 Most of the information presented in this post can be found in the Qolsys IQ Panel 2 DIY Installation Manual. You are free to follow along with that manual, which can be found here. We also have three (3) videos that we will include along the way. Feel free to follow along with those as well. All of this information applies to both the original IQ Panel 2 and the newer IQ Panel 2 Plus. With that out of the way, let's get started!
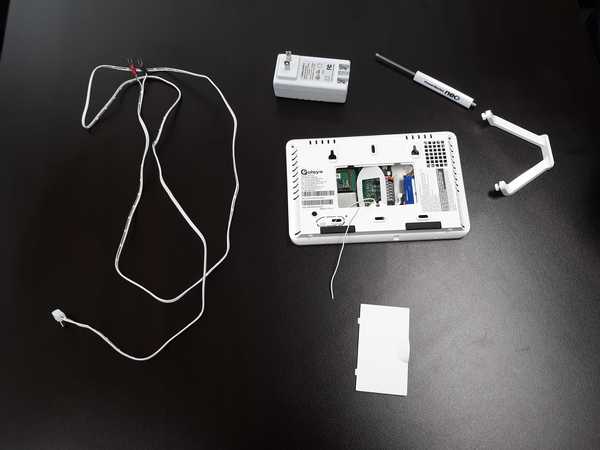
The first thing you will want to do is power on the system. The Qolsys IQ Panel 2 Plus comes with everything you need to get started. Once you have opened up the box, you should locate the panel, the power supply transformer, the power wire, the panel back cover, and the table stand. You will also want to have a screwdriver on hand.

Start by connecting the spade lugs of the power cable to the transformer. The IQ Panel 2 Plus uses DC power, so you must make sure to follow polarity. That means connecting the positive (+) wire and negative (-) wire accordingly. The positive and negative ends on the IQ Panel 2 power cable are marked for this purpose. The positive (+) wire has grey dashes and ends in a red spade connector. The negative (-) wire is solid white without grey dashes and ends in a black spade connector. Make sure that the wires are connected with the proper terminals on the transformer. You can see the positive (+) and negative (-) terminals marked on the transformer. The connection should be nice and snug, but not overly tight.
From there, you can connect the other end of the power cable to the IQ Panel 2 Plus System. There is a simple barrel connection for this purpose. The transformer can then be plugged into a wall outlet. When applying the panel back cover, make sure to run both the power cable and the thin RF receiver cable out from the indentation on the back cover. The back cover should snap nicely into place. The convenient table stand can be installed by putting it into the keyhole slots on the back of the panel and then sliding up. You can power on the system by pressing and holding the side power button until the system LED remains lit.
After the system powers on and boots up, you will be greeted by the Setup Wizard. It is recommended that you go through the Setup Wizard, as it will walk you through the entire setup process. Note that some steps of the Wizard will require you to activate the system for monitoring service. This involves registering the panel's built-in cellular communicator with Alarm.com. This is optional for initial set up. You can always register the cellular communicator with Alarm.com later.
Remember that activating the system is something you will definitely want to do before too long, as that is the only way for it to send out signals to you and/or a central station. Remember that you will need to provide the IMEI Number for the system in order for your monitoring company to activate the cellular communicator. This can be found on a sticker on the back of the panel. It will also be shown as you move through the Wizard.
You will do several things as you go through the Setup Wizard. You will connect the system to a WIFI network, run an initial check for the system, add sensors, perform an initial sensor test, set up the built-in panel glass break sensor, add Z-Wave home automation devices, pair your phone for automatic Bluetooth disarming, pair secondary IQ Remote Keypads, and add system users. Remember that you will want to have a good idea of Sensor Groups when enrolling sensors. You can learn all about the IQ Panel 2 Sensor Groups in this helpful FAQ.
The last thing you will want to do is install your sensors. We only focused on door and window contacts and motion sensors, but many of the same principles apply across any sensor type. What's great about wireless sensors that are used with the IQ Panel 2 Plus is that they can be mounted without drilling holes into the wall or using any power tools. You can safely mount and secure these sensors using double-sided foam tape. Most wireless sensors come with their own double-sided tape for this purpose, or you can buy some off our site!
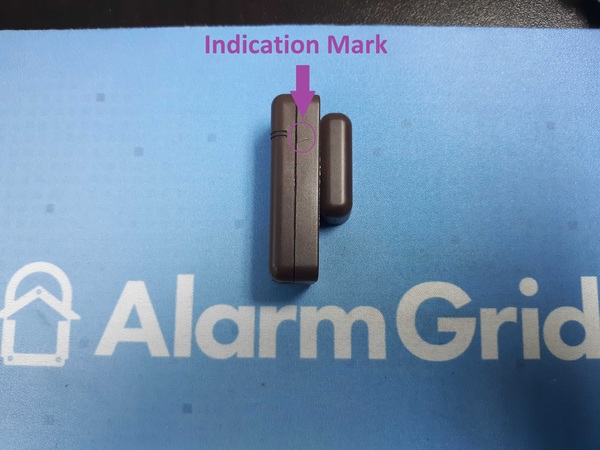
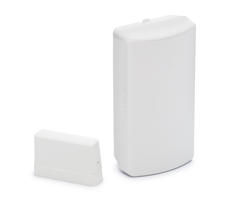
There are a few general tips when mounting these sensors. When mounting door and window contacts, you should have the magnet on the moving structure of the door or window, and the sensor itself on the door or window frame. Make sure the magnet is aligned with any indication marker shown on the sensor. Also remember to keep the magnet spacing gap in mind. Most Qolsys Door and Window Sensors allow for a magnet spacing gap of up to 0.75 inches.

As for motion sensors, you should have them mounted flat on a wall or corner-mounted. But keep in mind that only a flat-mount will allow you to install without drilling any holes. The motion sensor should be nice and level, and it should be installed at a height between 6 and 8 feet. Qolsys recommends 7.5 feet, which provides the best possible results. The motion sensor should not be facing any windows, vents, or air ducts. It should also not be facing any nearby furniture or stairwells if you have pets!
Most importantly, remember to test ALL your sensors after the final installation!
And that wraps up our Part 1 Guide for installing and using the Qolsys IQ Panel 2 Plus. Look forward to Part 2 coming soon! If you have any questions about the Qolsys IQ Panel 2 Plus or our monitoring service, please reach out to us by emailing support@alarmgrid.com. Remember that our support hours are from 9am to 8pm ET M-F. We look forward to hearing from you!


 Most of the information presented in this post can be found in the Qolsys IQ Panel 2 DIY Installation Manual. You are free to follow along with that manual, which can be found

