Training Posts

Posted By

Alarm Grid is back with another video recap! We've got some great new videos to help you get the very most out of your security system. As always, we hope that you find the new videos to be informative and helpful. Let's check out the newest tutorial videos from the Alarm Grid team!

Install Honeywell LTE-XA or LTE-XV On VISTA-15P, VISTA-20P, VISTA-21iP

I show you how to add a Honeywell LTE-XA or Honeywell LTE-XV to a Honeywell VISTA P-Series Alarm Panel. The LTE-XA and LTE-XV are cellular communicators used by VISTA Alarm Panels to communicate with the AlarmNet servers. Adding a communicator to a VISTA System is necessary for getting it monitored and set up with the Total Connect 2.0 platform for controlling the system remotely. The communicator will use a 4-wire connection that is made at the panel's ECP bus.


Troubleshooting No Signal issue on Resideo LTE-XA or LTE-XV

In a follow up to the previous video, I show you the general troubleshooting steps to perform when there is no signal on a Honeywell LTE-XA or LTE-XV. As these are cellular modules, an adequate cell signal is required for them to work properly. You might get a lack of cell signal due to the communicator being used too far from a cell tower, a SIM card that needs to be re-seated, or due to a SIM card that is not yet activated.


Checking the ECP and RIS Address On a Tuxedo

I show you how to check the ECP Address and the RIS Address on a Honeywell Home Tuxedo Keypad. Both the ECP Address and the RIS Address are found in the same menu. The Enhanced Console Protocol (ECP) Address tells the panel where to find the Tuxedo as a keypad controller. Setting the ECP is sometimes referred to as addressing the keypad. The Remote Interactive Service (RIS) Address tells Total Connect 2.0 and AlarmNet where to find the Tuxedo as an automation controller.


Enrolling the DSC PG9914 Motion Sensor to a Qolsys IQ Panel 2 Plus

I show you how to pair the DSC PG9914 Motion Sensor with a Qolsys IQ Panel 2 Plus Security System. The DSC PG9914 is a PowerG Sensor, and it can be used with any version of the Qolsys IQ Panel 2 Plus. The sensor offers a coverage area of up to 39 feet, pet immunity of up to 85 pounds, a wireless communication range of up to 2,000 feet away from the IQ Panel 2 Plus, and 128-bit AES encryption.


Upgrading a Honeywell Lyric to Use LTE

I show you how to upgrade the Honeywell Lyric Controller to support an LTE communicator. In order to do this, you will need a compatible LTE cellular communicator. The compatible modules include the Honeywell LYRICLTE-A AT&T LTE Communicator and the Honeywell LYRICLTE-V Verizon LTE Communicator. You will need to get a monitoring plan that includes cellular connectivity, such as an Alarm Grid Gold or Platinum Level Plan. This is necessary for activating the communicator for monitoring service.

Tags: , , , , , , , , , , ,

Comments


Posted By

It was a relatively calm week for our video team, but we still managed to put up a few new videos. Most of these are usual tutorial videos, but we did make one extra movie for fun at the end of the week. We hope you enjoy these videos. Let's check out the recap for September 18th thru 25th.

Programming a SiXFOB to the Lyric Controller

This video was actually uploaded super late last week, and it missed the last recap, so we decided to put it into this one! I show you how to program a Honeywell SiXFOB Key Fob with a Honeywell Lyric Alarm System. The Honeywell SiXFOB is a 4-button key fob that is great for arming, disarming, and triggering emergency panics. As a member of the Honeywell SiX Series, the Honeywell SiXFOB is designed exclusively for use with the Lyric System, and it uses 128-bit AES encryption for enhanced wireless security.


Remove All Devices Button On IQ Panel 2

I show you the Remove All Devices button in the Z-Wave Menu for the Qolsys IQ Panel 2 Plus. This button serves as a reset for the system's internal Z-Wave Plus controller, and it clears all of the programmed Z-Wave devices from the system. Any Z-Wave device you want to continue using with the IQ Panel 2 will need to be re-added to the system. It will be necessary to clear these devices from the network before adding them back in, as they will still have residual Z-Wave data from when they were paired with the system originally.


Honeywell Home Tuxedo Is Not a Standalone Alarm Panel

I explain how the Honeywell Home Tuxedo Keypad is not a standalone alarm panel. Many users mistakenly believe that the touchscreen keypad is the actual alarm system. But in reality, the Tuxedo is just a keypad controller for a Honeywell VISTA System. The actual panel is usually found in a beige metal cabinet. This metal enclosure is often tucked away in a basement, attic, garage, or storage closet. Do not confuse the Honeywell Home Tuxedo with an actual Honeywell VISTA Security System.


Using Console Mode on a Honeywell Home Tuxedo

I show you how to use Console Mode on a Honeywell Home Tuxedo Keypad. Console Mode allows the Tuxedo to be used in the same way as an Alphanumeric Keypad, such as a Honeywell 6160. Putting the Tuxedo into Console Mode is necessary when programming the system. This includes adding, editing, and deleting system zones and making other various changes to the system settings. Remember that the Tuxedo will automatically reboot as soon as you exit system programming.


Connect Tuxedo Keypad to WIFI

I show you how to connect a Honeywell Home Tuxedo Keypad to a local WIFI network. The reason why the Tuxedo connects to WIFI is to send and receive automation commands from Total Connect 2.0. This internet connection also allows the Tuxedo to receive firmware updates from AlarmNet and display a weather forecast on the main screen. The Tuxedo Keypad can connect with both 2.4 GHz and 5 GHz WIFI networks. Wired ethernet connectivity cannot be used with the Tuxedo.


Mike's Birthday Punches

Okay, this isn't a security system video, but we needed to fit Jarrett into some video for the week. Jarrett punches me 28 times, in honor of my 28th birthday. Jarrett sure packed some heat into his punches, but I took it pretty decently if I do say so myself. I then made sure to remind the viewers to contact support@alarmgrid.com for monitoring information. I'll need to remember to pay Jarrett back on his birthday a few months from now!

Tags: , , ,

Comments


Posted By

Alarm Grid is here with another video recap! This time, we have nine (9) new videos to check out. Jarrett again stepped up this week and did a couple of videos. Our team is thrilled to have him back in the Alarm Grid studio. Let's take a look at the latest tutorial videos from Alarm Grid.

Assigning User Codes to Partitions On the IQ Panel 2 Plus

I show you how to assign user codes to different partitions on the Qolsys IQ Panel 2 Plus. When you have partitions enabled on the IQ2+, you will need to assign partitions to every programmed user code. A user code will only be able to control a partition that it has been assigned. The system's Master Code, also known as the Admin Code, has access to every partition on the system. There are up to four (4) partitions available on the IQ2+.


Getting Into Z-Wave Programming on a Honeywell Home Tuxedo

I show you how to access Z-Wave programming on a Honeywell Home Tuxedo Keypad. In addition to serving as a touchscreen keypad for a Honeywell VISTA System, the Tuxedo is also used as a Z-Wave Plus controller. In order to add, remove, and edit any of the Z-Wave devices used with the Tuxedo, you must access the Z-Wave Programming Menu. This menu is easy to access so that you can begin quickly setting up your home automation network.


Opening the Honeywell SiXCOMBO

I show you how to open up the Honeywell SiXCOMBO Combination Smoke, Heat, and CO Detector. You will normally need to open up the SiXCOMBO to change the batteries and to access the inside sticker with important device information. The SiXCOMBO uses four (4) lithium CR123A batteries, also known as camera batteries, and it has an average battery life of five (5) years. The inner sticker includes information like the device's Serial Number, manufacture date, and more.


The Resideo Tuxedo is Not an Alarm Communicator

I explain how the Resideo Tuxedo is not an AlarmNet Communicator for a security system. Although the Tuxedo connects to a local WIFI network, it does not do so for the purpose of providing IP connectivity for the panel. The Tuxedo merely connects to the internet to relay automation commands from Total Connect 2.0 and for receiving firmware updates. The user must still add a compatible communicator to their VISTA System to set up alarm monitoring.


Using More Than One SkyBell With Total Connect 2.0

Jarrett explains how Total Connect 2.0 allows you to pair up to five (5) SkyBell Video Doorbell devices per account. The account does not need to include true video monitoring service for the SkyBell devices to work. If you want to use more than 5 SkyBell Video Doorbells with Total Connect 2.0, then it is necessary to sign-up for a second account. You can link the multiple accounts so that you can access them using the same login information.


Setting up Total Connect 2.0 Notifications

I explain how to setup text and email notifications in Total Connect 2.0. Text and email notifications help ensure that you are notified regarding any activity on your Honeywell Security System. This is very important for self-monitored users who do not have central station service, as they must receive these notifications and take proper action during emergencies. To set up notifications, you must create user profiles, assign phone numbers and/or email addresses to those profiles, then build notification groups and include the user profiles, and finally assign which notifications go to each group.


Changing the Battery in a Honeywell 5834-4

Jarrett shows you how to change the battery inside of a Honeywell 5834-4 Key Fob. The Honeywell 5834-4 uses a single lithium CR2032 coin battery for power. Expected battery life is roughly three (3) to five (5) years with typical usage. A Phillips screwdriver is needed to remove the back cover for the Honeywell 5834-4 and access the battery compartment. Make sure to observe proper polarity when inserting the new battery. The positive side for the CR2032 battery should be visible, once the battery has been inserted.


Using the Resideo Tuxedo Without an Alarm Panel

I explain how you can technically use the Resideo Tuxedo without an alarm panel. This is not commonly done, as the Tuxedo is primarily a keypad for a Honeywell VISTA System. But you do have the option of providing power to the Tuxedo and using it as a standalone automation controller for Z-Wave smart home devices. Some examples of Z-Wave devices that you can pair with the Tuxedo include smart lights, door locks, programmable thermostats, and more.


Install Honeywell LTE-XA or LTE- XV On a VISTA TURBO

I show you how to install a Honeywell LTE-XA AT&T LTE Communicator or a Honeywell LTE-XV Verizon LTE Communicator on a Honeywell VISTA TURBO Series Panel, such as a Honeywell VISTA-128BPT or a Honeywell VISTA-250BPT. The added communicator will allow the panel to communicate with the AlarmNet servers across a cellular network. This will allow the system to be monitored. The user will need a monitoring plan that includes cellular communication, such as an Alarm Grid Gold or Platinum Plan.

Tags: , , ,

Comments


Posted By

As security professionals, we often encounter myths regarding security systems. There is a lot of untrue information out there, so we figured it would be a good idea to debunk a few security system myths to help end users understand the facts. Here are three false security system myths.


Myth #1 - Only Professionals Can Install a Security System

There was once a time when security systems were hardwired, and it was virtually impossible for a DIY user to install one. But with the rise of wireless alarm panels, many security systems can be installed using nothing more than a screwdriver. An end user can install their own system, program their own sensors, and get their system activated for monitoring service. Most wireless alarm panels even support desk mounts that allow a user to install a system without drilling holes in the walls. This can help a user save a lot of money by not having to hire a professional installer.

Myth #2 - Wireless Security Systems Are Not Secure

When wireless security systems first hit the market, many were easily defeated by third party devices. An intruder could block the signals from wireless sensors and prevent them from reaching the panel. They could also send false signals to the panel to make it appear as though a break-in was occurring, when really nothing was happening. But most modern wireless panels support encryption to prevent this from happening. This makes foul play all but impossible. There are many encrypted sensor options to choose from, including the Honeywell SiX Series Sensors for the Honeywell Lyric, the PowerG Sensors for the Qolsys IQ Panel 2 Plus, and the eSeries Sensors for the 2GIG GC3e.

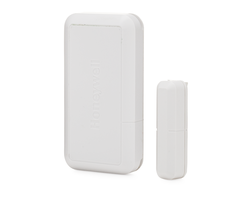
Honeywell sixminict wireless door slash window contact for lyric

Myth #3 - Security Systems Only Perform Security Functions

When shopping for a security system, many buyers only consider the security aspects. The reality is that a modern security system does so much more than just keep you and those around you safe. Nearly every security system on the market today also offers smart home automation capabilities. You can pair a variety of smart home devices with your system, including smart lights, door locks, programmable thermostats, and more. You can then control these devices from the panel and have them activate automatically with programmed smart scenes. And if your system is monitored, then you can control the devices from anywhere using a web browser or a mobile app on your phone.


Security systems today are more powerful and easier to use than ever before. Now is a great time to get started with a new security system for your home or business. Check out this post to learn more about the monitoring plans offered by Alarm Grid. If you're interested in getting started, then please email us at support@alarmgrid.com for more information. Our team checks email from 9am to 8pm ET M-F. We look forward to hearing from you!

Tags: , , , , , , , , , , ,

Comments


Posted By

We have another video recap lined up for you! This time there are three (3) new videos to check out. And this happens to be a very special video recap, because our fan-favorite technician makes his much-anticipated return! Let's take a look at the new Alarm Grid videos for September 11th.

Making All Partitions Sound on the Qolsys IQ Panel 2

The man. The legend. Jarrett is back, and he's going to talk about how you make all partitions sound on the Qolsys IQ Panel 2. When you enable partitions on the IQ Panel 2, only sensors on partition 1 will trigger sounds, by default. If you want the system to produce sounds for other sensors, then you must enable the Global Intrusion Sounds and Sirens feature for the system. This will require accessing programming with the Installer Code (default 1111).


Arm Stay and Arm Instant

Jarrett is excited to explain the difference between Arm Stay Mode and Arm Instant Mode. When you Arm Instant, the system ignores Entry Delay periods. This means that if you fault an Entry/Exit Zone while the system is Armed Instant, then the system will go into immediate alarm, instead of giving you a chance to disarm during the Entry Delay countdown. In Armed Stay, you get the Entry Delay when you fault an Entry/Exit Zone. Both Arm Stay and Arm Instant will automatically bypass interior zone types.


Program SiXSMOKE to Lyric Controller

I show you how to program a Honeywell SiXSMOKE to the Honeywell Lyric Alarm System. The Honeywell SiXSMOKE is an encrypted smoke and heat detector built exclusively for use with the Lyric. The smoke detector portion is photoelectric, which means that there is a small light inside the sensor. Smoke entering the chamber will cause the light to refract, which tells the sensor to report to the system. The heat detector uses both fixed temperature detection and rate-of-rise detection. The sensor has an 85 dB sounder.

Tags: , , , ,

Comments


Posted By

It's the first Alarm Grid video recap of September! We have some great new videos to show you, and we're hopeful that you find them helpful in setting up your system. Subscribe to our YouTube channel if you haven't yet, and stay tuned for future videos. Let's check out the newest videos.


Using a Qolsys IQ Panel 2 with a Phone Line

I explain how you cannot use the Qolsys IQ Panel 2 with a phone line connection. Phone line connectivity was once the most common communication path used with security systems. But with the rise of internet and cellular, that is no longer the case. Most newer panels like the IQ Panel 2 don't even have a jack for using a phone line. Instead, the system has built-in WIFI and cellular. Remember that activating for monitoring service with use of Alarm.com requires the activation of the system's cellular communicator.


Removing a Z Wave Device from a Qolsys IQ Panel 2

I show you how to remove, or clear, a Z-Wave device from the network by using a Qolsys IQ Panel 2 Plus. Clearing a Z-Wave device is typically done before enrolling it with the network to ensure that all the network data is properly wiped out. It is also done if the user no longer intends on using the Z-Wave device anymore. It is important to note that a device can still be cleared from the network even if it isn't actively enrolled with a Z-Wave hub.


Program SiXCT to Lyric Controller

I show you how to program a Honeywell SiXCT Door and Window Contact Sensor to a Honeywell Lyric Alarm System. The Honeywell SiXCT is a wireless door and window sensor that uses 128-bit AES encryption for enhanced wireless security. The sensor has a terminal block so that you can use it as a wireless transmitter with a wired contact sensor. The wireless range for the SiXCT is roughly 300 nominal feet, and it has a green LED light to assist with enrollment.


Program SiXMINICT to Lyric Controller

I show you how to program a Honeywell SiXMINICT to a Honeywell Lyric Alarm System. The SiXMINICT is a smaller version of the SiXCT. Unlike the SiXCT, the Honeywell SiXMINICT does not have a terminal block, and the sensor cannot be used as a wireless transmitter. It also has a smaller wireless signal range of only about 200 nominal feet. However, this door and window sensor is smaller than the SiXCT, and many users prefer the more compact design of the SiXMINICT. It retains the same green LED light to assist with enrollment.


Program a Honeywell SiXGB to the Lyric Security System

I show you how to program a Honeywell SiXGB Glass Break Sensor to a Honeywell Lyric Security System. As a member of the Honeywell SiX Series Lineup, the SiXGB utilizes 128-bit AES encryption, and it can only be used with the Lyric System. The wireless glass break sensor actively listens for the sound of breaking glass. It is great for monitoring windows and protective glass casings. The sensor has a detection range of roughly 25 feet, and it needs a direct line of sight to any glass being monitored.


Adding an External Communicator to a DSC PowerSeries NEO

I show you how to install an external communicator for a DSC PowerSeries NEO Security System. The PowerSeries NEO requires an added communicator for connecting with Alarm.com. The communicator connects with the DSC PCL-422 Module, which comes included. Then, a PC-Link cable connection is made between the NEO Panel and the PCL-422. Once the communicator is properly installed, you will need to activate it for monitoring service. Remember that you will need a monitoring plan that offers cellular communication.

Tags: , , , , ,

Comments


Posted By

If you're using a newer wireless security system, then you will definitely want to explore the encrypted sensor options that we offer! Encrypted sensors are virtually impossible to hack, and they can make your security system even more secure. There are many great options available.

Honeywell sixminictpk5 a 5 pack of sixminict encrypted wireless

As you know, a home security system or a business security system is an investment you make for the protection of yourself, your property, and those around you. A proper system should also give you peace of mind and make you feel safe. It doesn't do you any good if an intruder manages to defeat your system. But with encrypted sensors, that is extremely unlikely to ever happen.

If you aren't familiar with encryption, it refers to techniques for encoding data and signals so that only authorized individuals and/or equipment are able to access the information. When it comes to wireless alarm systems, encrypted sensors send protected signals that can only be accessed, received, and interpreted by the authorized panel.

When wireless systems first rose to prominence, they rarely, if ever, used encryption. This made many people wary of wireless security panels, and they felt more secure using wired ones. The lack of encryption wasn't seen as a fatal flaw, as an intruder would have to be extremely savvy and really know what they're doing to defeat even a non-encrypted sensor. To this day, many people feel totally comfortable and safe using non-encrypted equipment. Remember, most intruders don't have the knowledge to beat wireless sensors, even if they aren't using encryption.

But there are the rare, professional criminals who do take the time to extensively study security equipment, and they develop techniques for beating non-encrypted devices. This is very uncommon, but it's not unheard of. And if you aren't using encrypted sensors, then you are leaving yourself open to this small risk. Whether or not that means outfitting your system with all-new encrypted sensors, or even upgrading to a different system that is capable of supporting encrypted sensors is up to you. We just want to make you aware of your options.

Today, we're going to briefly look at some popular wireless systems and explore their encrypted sensor options, as well as their non-encrypted sensor lineups. This will help you learn more about your system, or one you are considering for purchase.


Honeywell Lyric Controller

Honeywell lyric controller encrypted wireless security system


The Lyric represents the first the first encrypted panel from Resideo, formerly known as Honeywell. The system has its very own lineup of encrypted sensors called the Honeywell SiX Series Sensors. The lineup is a bit limited, as its lacking options like an outdoor door and window sensor and a curtain motion sensor. But the good news is that these sensors are extremely secure with their military grade 128-bit AES encryption.

You can supplement your SiX Series Sensors on your Lyric System with devices from the Honeywell 5800 Series. These sensors are not encrypted, but the lineup offers more diverse selection than the SiX Series lineup. You could consider using encrypted sensors for the most vulnerable parts of your home or office, while using non-encrypted 5800 Series devices for areas where it isn't as important. The non-encrypted 2GIG 345 MHz Sensors are also compatible with the Lyric once the system is on Firmware Version MR3 or higher.


Qolsys IQ Panel 2 Plus

Qolsys iq panel 2 plus verizon lte with powerg s line and legacy


There are some outstanding encryption options available for the Qolsys IQ Panel 2 Plus, regardless of which version you have. Any IQ Panel 2 Plus System can readily support DSC PowerG Sensors. Not only do these sensors have an outstanding wireless range of up to 2,000 feet away from the IQ Panel 2 Plus, they also utilize military grade 128-bit AES encryption and Frequency Hopping Spread Spectrum (FHSS) technology.

And if you have the 319.5 MHz Version of the Qolsys IQ Panel 2 Plus, then you can also pair Qolsys S-Line Sensors, which use rolling code encryption. This rolling code encryption isn't quite as secure as the encryption used by PowerG Sensors, but it still does a good job of keeping your system protected. The S-Line Sensors will also utilize encryption when paired with the original Qolsys IQ Panel 2. The original IQ Panel 2 cannot use PowerG Sensors.

In terms of non-encrypted options, each IQ Panel 2 Plus can support one of three (3) non-encrypted radio frequency signals. The available options are 319.5 MHz, 345 MHz, and 433 MHz, and it is dependent upon which version of the IQ Panel 2 Plus you buy. Again, it is certainly possible to mix encrypted sensors with non-encrypted sensors on the same system. But with the diversity and selection of the PowerG lineup, you probably won't need to look outside too much.


2GIG GC3e
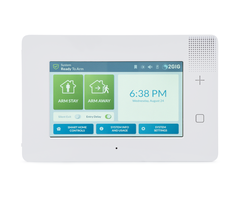
2gig gc3e wireless encrypted alarm panel


The big highlight when the 2GIG GC3e was introduced was its ability to support encrypted sensors. While it took a little while before its encrypted sensor lineup became available, we were very pleased with the result. The 2GIG eSeries Sensors use highly secure encryption to keep your system protected. It also seems that 2GIG is regularly expanding upon this lineup, as we have been seeing new eSeries Sensors hit the market it recent times. All of the 2GIG eSeries Sensors are compatible with the GC3e, as well as its little brother, the GC2e.

With the GC3e, you also get access to the Honeywell 5800 Sensors and the 2GIG 345 MHz lineup. Just like with the Lyric, there is a bit more of a diverse selection of non-encrypted sensors available for the 2GIG GC3e. You can definitely set up a mixture of encrypted and non-encrypted sensors to meet the needs of your business. But with new 2GIG eSeries offerings continuing to become available, you shouldn't have much trouble building a fully encrypted 2GIG Security System.


Alarm grid inside security stickers

If you are looking to set up an encrypted security system, then Alarm Grid is here to help! We can let you know if your existing system has any encrypted sensor options available. We can also help you determine if you are currently using encrypted devices or if your existing sensors are non-encrypted. Many users have trouble determining. Either way, we'll help you make an informed decision so that you can get the most out of your monitoring service. If you want to reach us, please email support@alarmgrid.com. We check our email from 9am to 8pm ET M-F. We look forward to hearing from you!

Tags: , , , , , , , , , , , , , , , , , , , , , , , , , , , , , , , , , , , , , , , , , , ,

Comments


Posted By

Alarm Grid is back with another video recap! This time, we have six (6) new videos to share. We spent a lot of time this week focusing on the 2GIG GC3e, but we also covered some other security equipment as well. We hope you enjoy this latest batch of videos. Let's check them out!

Alarm grid inside security stickers

Properly Opening Up a 2GIG GC3e

I show you how to open up the 2GIG GC3e Security Panel. Before opening the system, you must loosen the set screw at the bottom. If the panel is wall-mounted, you can press the panel against the wall and lift upward. Otherwise, lay the panel face-down, and pop off the back plate using your finger or a screwdriver. Opening up the GC3e Panel is often done to access the system's terminal block and backup battery.


Powering On the 2GIG GC3e

I show you how to power on the 2GIG GC3e Alarm System. The system uses a 14VDC, 1.7A transformer for primary power. If primary power is lost, then a backup battery will keep the system running. When powering on the 2GIG GC3e, we recommend connecting the backup battery first, followed by the transformer. Alarm wiring is not included with the 2GIG GC3e, so you must supply your own. We recommend using a Honeywell LT-Cable for this purpose.


Deleting a Defective Z-Wave Device from the GC3 or GC3e

I show you how to delete a defective Z-Wave device from a 2GIG GC3 or 2GIG GC3e. Some reasons why a Z-Wave device might be displayed as failed include the device being powered down or out of wireless range. Deleting a defective Z-Wave device is usually a good option if the device is lost or destroyed so that a traditional exclusion process cannot be performed. Any failed Z-Wave device will have an error icon next to it in the Smart Home Devices Menu.


Setting Up a Cellular Communicator for a 2GIG GC3e

I show you how to add a cellular communicator to a 2GIG GC3e Security System. Doing this will allow you to activate the 2GIG GC3e System for monitoring service. And if the monitoring plan includes access to Alarm.com, then you will also be able to control the system remotely through that platform. The 2GIG GC3e has a side slot for you to easily install a cellular radio. Remember to power down the system completely before installing the cellular communicator.


Powering the TG-1 Express Using the On-Board Terminals

I show you how you can power the Telguard TG-1 Express using its on-board power terminals. The Telguard TG-1 Express is used to take over the phone dialer for a panel so that it can communicate across a cellular network. Normally, the TG-1 uses a single RJ31X connection for power and communication with the panel. But if the existing power wires from the RJ31X cable are cut, then you can instead make the auxiliary power connections at the TG-1 on-board terminals.


Properly Closing the Qolsys IQ Panel 2

I show you how to properly close the Qolsys IQ Panel 2 Security System. To properly close the system, you want to align the top tabs first. Then you should lock the bottom two (2) tabs into place. Lastly, make sure the top four (4) tabs remain closed, and click them into place if they are not. The panel will make a strange noise every half-hour if it is not closed properly. The main reason to open the IQ2 is to replace its backup battery every few years.

Tags: , , , , , , , , , , , , , , , , ,

Comments


Posted By

It's time for another video recap! There are eight (8) new videos this week, all featuring yours truly. We spent a lot of time working on the 2GIG GC2e again. We also covered the process for backdooring the Honeywell LYNX Touch Panels, and we touched on the IQ2+. Let's check out the videos!

Alarm grid inside security stickers

Pairing a Z-Wave Device with the 2GIG GC2e

I show you how to pair a Z-Wave device with a 2GIG GC2e Security System. The 2GIG GC2e serves as a Z-Wave Plus controller, which allows you to pair smart home automation devices with the system. Devices can be controlled locally at the panel, as well as remotely from Alarm.com if the system is monitored. There are many types of Z-Wave devices you can use with the GC2e, including lights, door locks, smart thermostats, and more!


Programming a Wireless Zone On a 2GIG GC2e

I show you how to program a wireless zone for a 2GIG GC2e Alarm System. Every sensor used with the 2GIG GC2e will take up at least one zone. The GC2e System has sixty (60) wireless zones available. You can pair sensors from the Honeywell 5800 Series, the 2GIG 345 MHz Series, and the 2GIG eSeries Lineup. We recommend auto-enrolling any new sensor to prevent entering an incorrect Serial Number. Auto-enrolling will also confirm successful communication.


Programming a Key Fob for a 2GIG GC2e

I show you how to program a key fob for a 2GIG GC2e Alarm Panel. A key fob is a small, handheld device that you can use to arm and disarm your system. You can very easily carry around a key fob in your pocket or purse, and they are great for putting on key rings. Popular key fob options for the 2GIG GC2e System include the 2GIG KEY2-345, the 2GIG KEY2e-345, and the Honeywell 5834-4.


Adding & Changing User Codes On a 2GIG GC2e

I show you how to add and change user codes on a 2GIG GC3 Security Panel. The GC2e has (64) user code slots available. You need a valid user code to successfully disarm the system. It is recommended that everyone who uses the system regularly has their own user code so that you can keep track of who uses the system. You can also apply a schedule to a code so that it only works at certain times.


Using the Backdoor to Enter Programming On a Honeywell L5200 or L5210

I show you how to use the backdoor method on a Honeywell L5200 or L5210. The backdoor method involves rebooting the panel and then performing a special sequence of commands as the system reloads. By completing this process, you can get into programming if you were previously locked out. Please note that the backdooring process will not work if the system is currently in an armed state. You will need to disarm the system before you can backdoor.


Getting Back Into Programming On an L7000 If You're Locked Out

I show you how to get into programming on a Honeywell L7000 if you're locked out by using the backdoor method. There are two (2) main reasons why you would become locked out of programming. The first is that the option "NO" was selected at the prompt asking if the installer should be allowed to re-enter programming. Always choose "YES" when exiting programming. The other possibility is that you do not know the Installer Code for the system. Do not change the Installer Code from its default of 4112 to avoid being locked out.


Secure Arming On the Qolsys IQ Panel 2 Plus

I demonstrate the Secure Arming feature on the Qolsys IQ Panel 2 Plus. When Secure Arming is enabled, you must enter a valid user code or the Master Code when arming the system. Normally, the system can be armed without providing a code. Additionally, you must also provide a code if you go to cancel an arming session during the Exit Delay countdown if this feature is enabled. Many parents with small children enable the feature to prevent the system from being armed accidentally.


IQ Panel 2 Exit Delay Increased After Opening Door

I explain why the Exit Delay timer on the Qolsys IQ Panel 2 Plus will automatically increase after opening a door. This is due to a false alarm prevention feature called Auto Exit Time Extension. This feature is activated if two (2) Entry/Exit faults are detected during the Exit Delay countdown. When you fault the first E/E Zone after arming, the system assumes that you have left the building. Then when another E/E fault is detected, the system assumes that you have returned. It then gives you an added 60 seconds to exit the building. If you quickly re-entered the premises because you forgot something, this prevents you from having to disarm and then re-arm the system.

Tags: , , , , , , , , , , , , , , , , ,

Comments


Posted By

We're here with another video recap! There are eight (8) new videos for you to check out this week. Once again, I took the role of appearing in all the videos. We hope to have some familiar faces returning soon! But for now, let's take a look at what our video team has been up to.

Alarm grid inside security stickers

Deleting a Wireless Zone from a Simon XT

I show you how to delete a wireless zone from a Simon XT Security System. The Simon XT uses 319.5 MHz wireless sensors, and it has forty (40) zone slots available. By accessing the Sensors Menu of Programming, you can delete any wireless zone that has been set up with the system. You can then enroll a new sensor in that open zone slot if needed. Keep in mind that the zone must be rebuilt from scratch if you decide to re-add the sensor back to the system.


Deleting a Wireless Zone from a Simon XTi or Simon XTi-5

I show you how to delete a wireless zone from a Simon XTi or Simon XTi-5. The Simon XTi and Simon XTi-5 are essentially the same as the Simon XT, except for the fact that these two panels have built-in touchscreen keypad. Both the Simon XTi and Simon XTi-5 have forty (40) available wireless zones, and they both use 319.5 MHz wireless sensors. If you delete a zone from the Simon XTi or Simon XTi-5, then you can reuse the zone with a new sensor.


Disabling Exit Sounds on a Qolsys IQ Panel 2 or IQ Panel 2 Plus

I show you how to disable Exit Delay sounds on the Qolsys IQ Panel 2 Plus. The IQ2 makes Exit Delay sounds for false alarm prevention. The idea is that if you accidentally Arm Away the system, then the Exit Delay sounds will alert you to the situation so that you know to either leave the building or cancel the arming session. But if you find Exit Delay sounds to be bothersome or annoying, there are a couple of different options for muting these sounds.


Cover Tamper Causes the Qolsys IQ Panel 2 to Make Strange Noises

I explain why the Qolsys IQ Panel 2 will make an usual noise every thirty (30) minutes. The reason why this happens is because the panel is not positioned on its back mounting plate properly. It can be a bit tricky to get the panel on the back plate properly, but once you do, the sound should stop occurring. If you absolutely cannot get the panel positioned on the back plate, then you do have the option of disabling tamper cover notifications in programming.


Manually Extending the Exit Delay Time On IQ2

I show you how to manually extend the Exit Delay countdown time on the Qolsys IQ Panel 2 for a single arming session. When you Arm Away on the IQ2, the Exit Delay timer will go into effect. You must then leave the building or cancel the arming session within the exit delay time limit. If you press the green +60 button, then the Exit Delay will be extended by sixty (60) seconds. You can only do this once per arming session. Pressing the button again will do nothing.


Permanently Extending the Exit Delay Time On IQ2

I show you how to permanently extend the Exit Delay countdown time on the Qolsys IQ Panel 2. By permanently extending the Exit Delay, you will have a longer amount of time to vacate the building every time you Arm. The system will use either the Normal Exit Delay setting or the Long Exit Delay setting depending on what zones you have programmed with the system. If you have at least one zone with Sensor Group 12 - Entry/Exit Long Delay, then the system will use the Long Exit Delay setting.


Installing a Honeywell 7847i on a VISTA P-Series Alarm Panel

I show you how to install a Honeywell 7847i on a VISTA P-Series Security System. The Honeywell 7847i is an IP communicator that allows a compatible panel to connect with the Resideo AlarmNet Servers for monitoring service. If you want to use Total Connect 2.0 with your system, then you must be running Firmware Version 9.12 or higher on a VISTA-15P or VISTA-20P. You can determine the firmware by checking the PROM Chip. No version of the VISTA-10P will work with Total Connect 2.0.


Installing a Honeywell 7847i On a VISTA TURBO Panel

I show you how to install a Honeywell 7847i on a Honeywell VISTA TURBO Panel, such as a Honeywell VISTA-128BPT or a Honeywell VISTA-250BPT. The most common reason why someone will choose to use an IP-only communicator is because they want monitoring costs to be as low as possible. IP monitoring is less expensive than cellular monitoring because no cellular service fees are incurred. But keep in mind that an internet outage will take your panel offline if you rely strictly on IP communication for your system.

Tags: , , , , , , , , , , , , ,

Comments